Agents
Connect your chatbot to Voxli so you can run tests against it.
Set Up Your Agent IntegrationWhat agents are
An agent is a connection between Voxli and your chatbot or AI assistant. When you run a scenario, Voxli sends messages to the agent and records the responses. You need at least one agent to run tests.
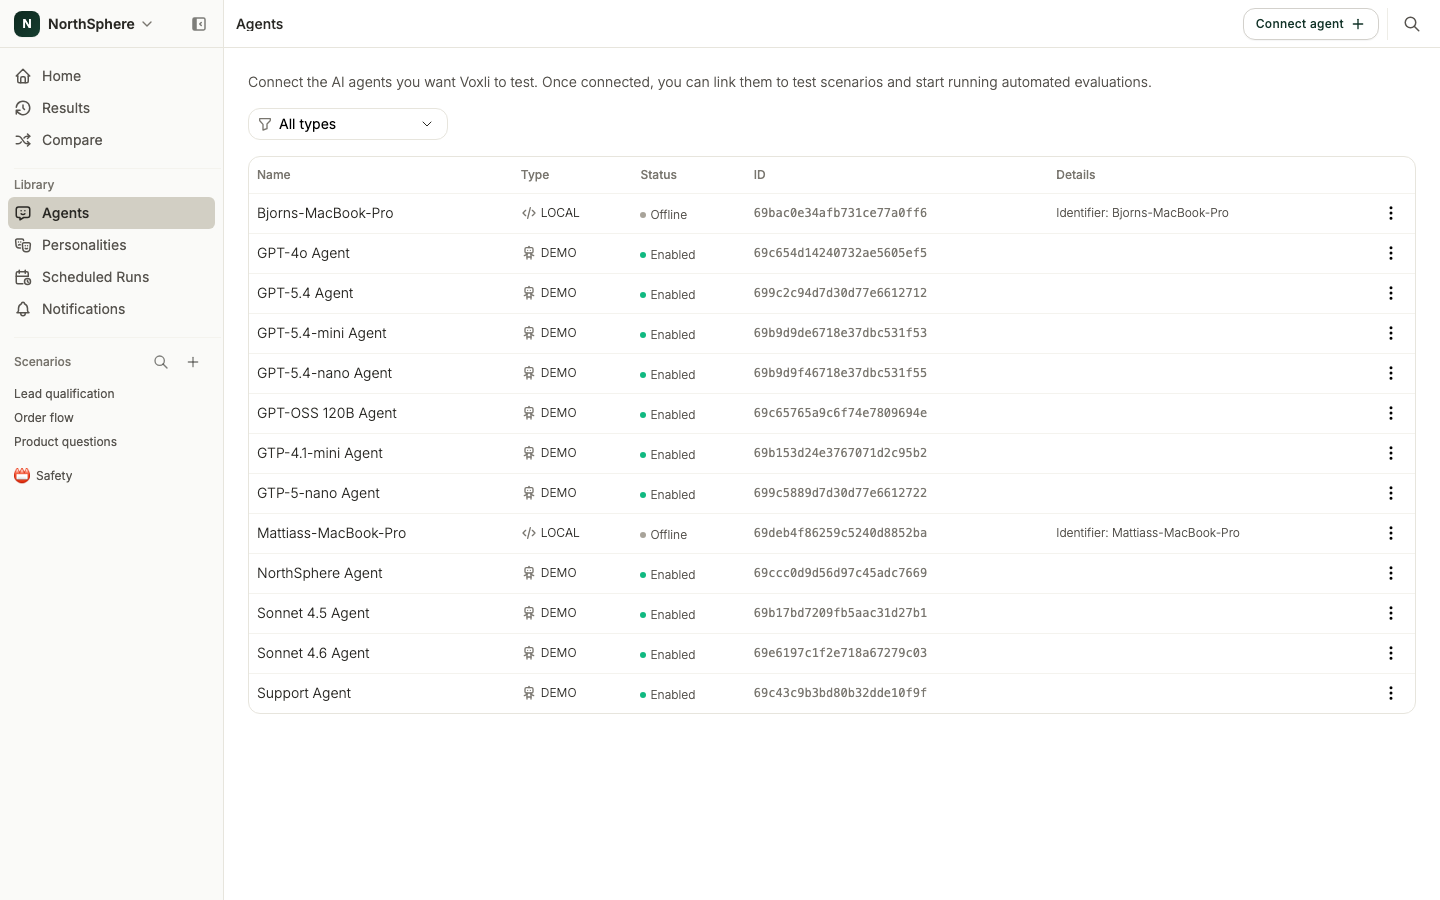
The Agents page
Open the Agents page from the left sidebar to see every agent you have connected, shown in a table. Each row lists the agent’s name, type, status, ID, and connection details. When you have several agents, use the Filter by type control to narrow the list.
Click any row to open its edit dialog. Each row also has a three-dot menu with these actions:
- Edit - change the agent’s configuration.
- Duplicate - make a copy. Available for Demo agents.
- Enable or Disable - a disabled agent keeps its configuration but does not appear when you pick an agent to run. Useful for pausing testing without losing the setup.
- Archive - remove the agent from the list.
Agent types
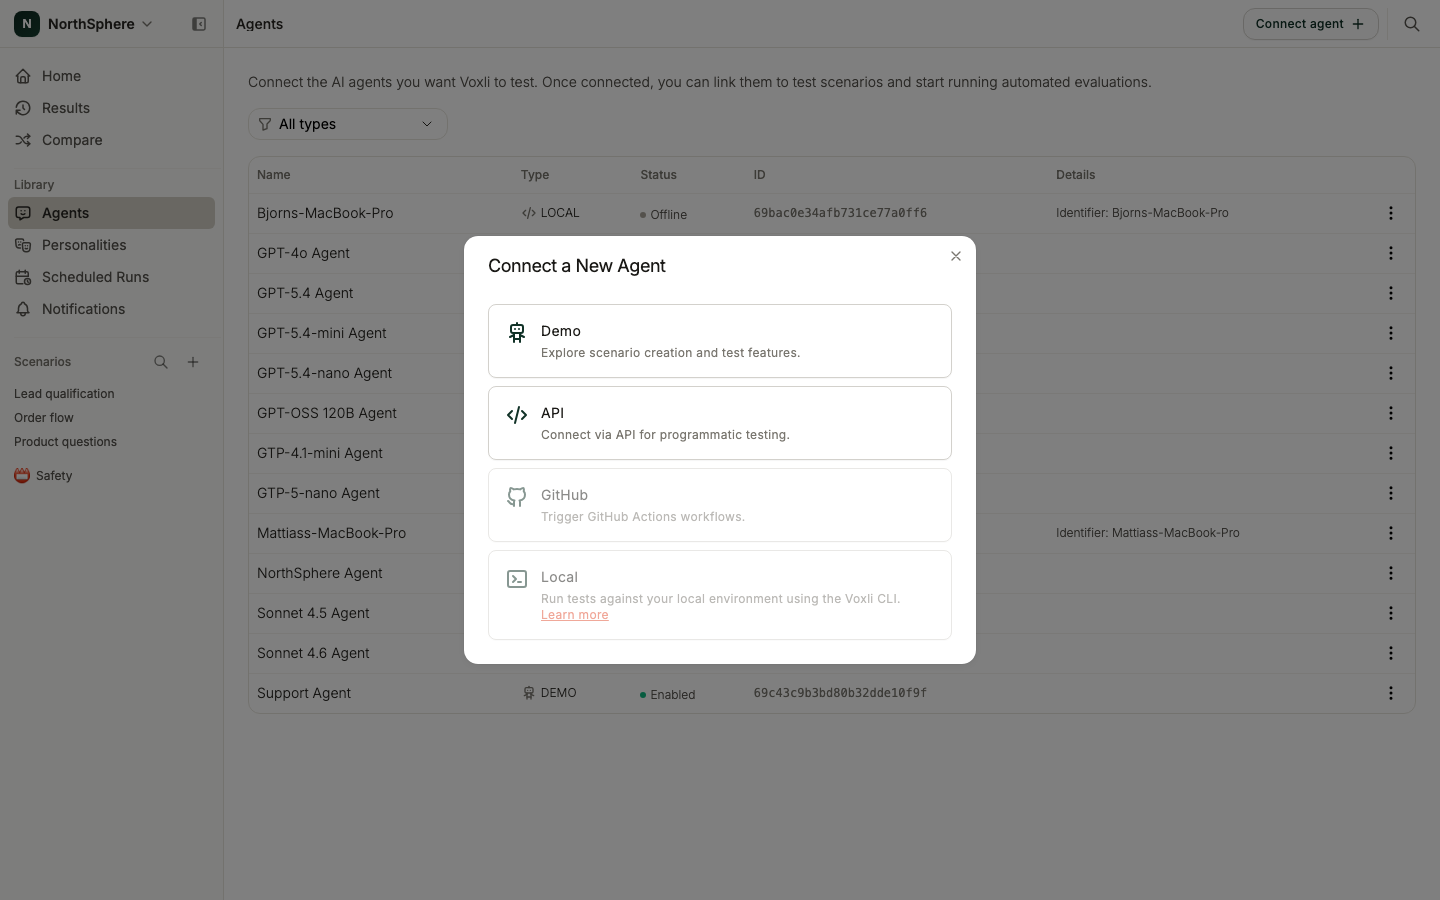
Click Connect agent to open the Connect a New Agent dialog and pick a type:
- Demo - a built-in test agent that comes with every account. No setup required. Great for learning Voxli before connecting a real chatbot.
- API - gives you full control. You trigger and manage the conversation from your side using the Voxli API.
- GitHub - runs tests as part of a GitHub Actions workflow. Connect the Voxli GitHub App first under GitHub Integration, then see GitHub in the developer docs for the workflow file.
- Local - tests an agent running on your own machine. You set this one up by running the Voxli CLI, which registers the agent and connects it. See Local in the developer docs.
The Demo agent
Every account has a Demo agent available out of the box. Use it to explore Voxli’s features without connecting a real chatbot. Its responses are limited - it is designed for learning the platform, not for production testing.
Connecting a new agent
- Go to the Agents page in the left sidebar.
- Click Connect agent.
- Select the agent type.
- Fill in the required configuration. Each agent type has different settings.
- Click Connect agent to save.
The new agent appears on the Agents page and becomes available when you run scenarios.
Local agent status
A Local agent shows whether it is currently reachable. The status reads Online when its runner has checked in recently, and Offline when it has not. A Local agent only runs tests while it is online, so check this before starting a run that targets one.
What’s next
- Run a Test - run a scenario against a connected agent.
- GitHub Integration - connect the GitHub App that powers GitHub agents.
- Comparing Agents - evaluate an agent across your scenarios.